In a previous article, I promised to take you through the process, including mistakes, of my Maisto 1:43 Ferrari kit build. It has taken me some time to get to this point but that has been due to the time spent on adding new articles to the Club's web site (please do take a look!).
As I said in my article I thought I'd pull a quick one and build a 1:43 scale Ferrari kit in answer to John Stanley's challenge as I was fast running out of time before the AGM Competitions. BUT my conscience wouldn't allow me to get off that easy and I decided that it would look better if I actually DID something to the kit.
So here's what I did......
Step 1
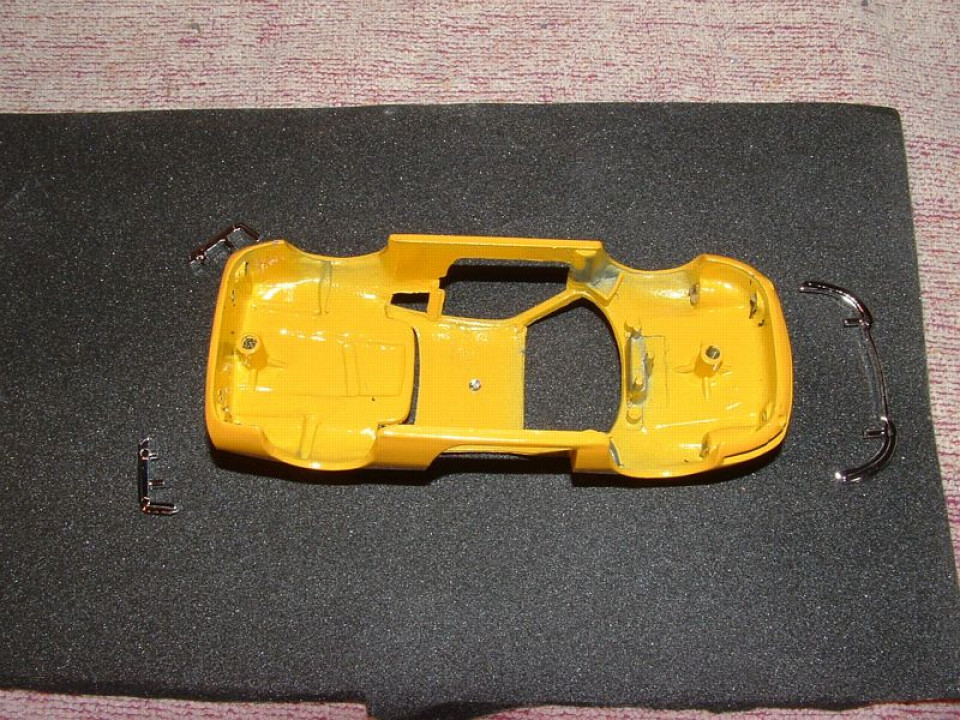
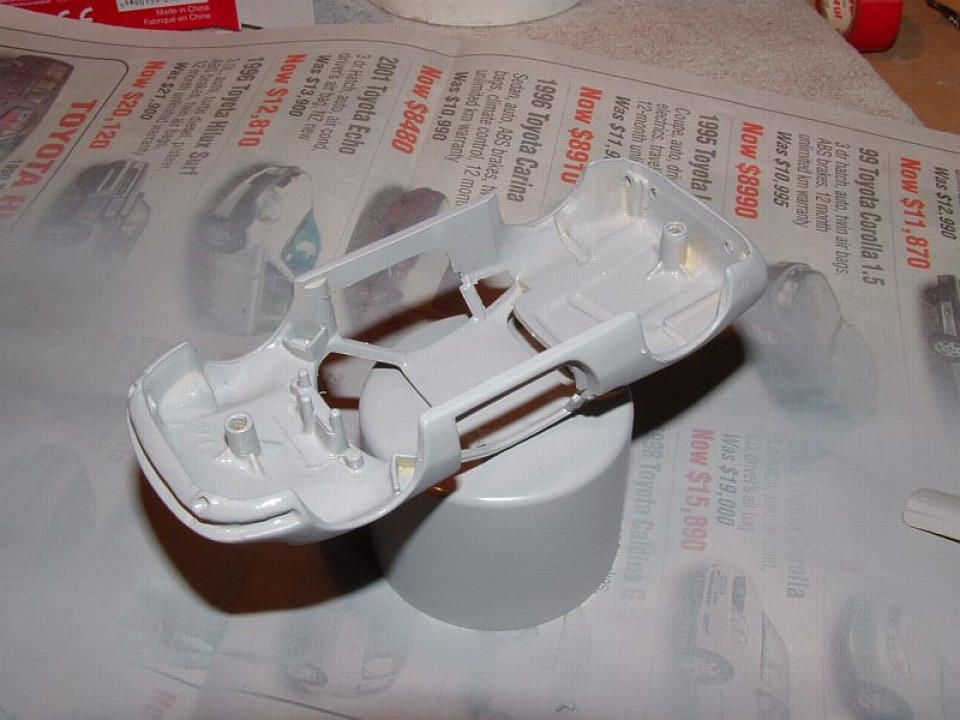
Having built the kit and having been struck by conscience I decided to completely dismantle the kit to its components. This entailed removing the baseplate and pull-back motor, removing the axles and wheels, removing the interior, leaving me with the die cast metal body to take apart.
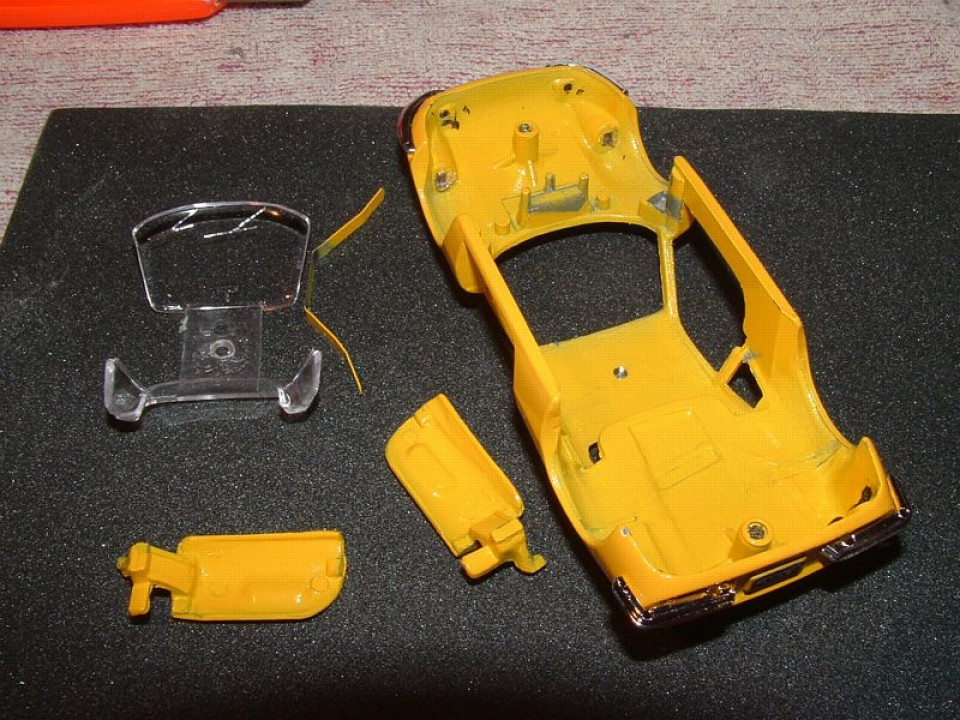
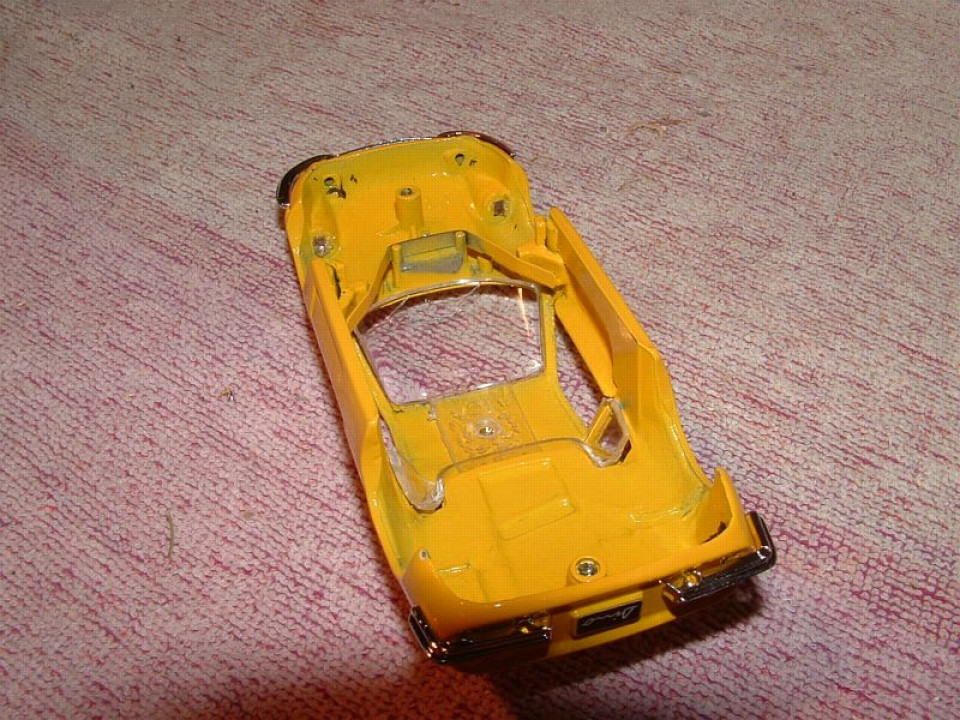
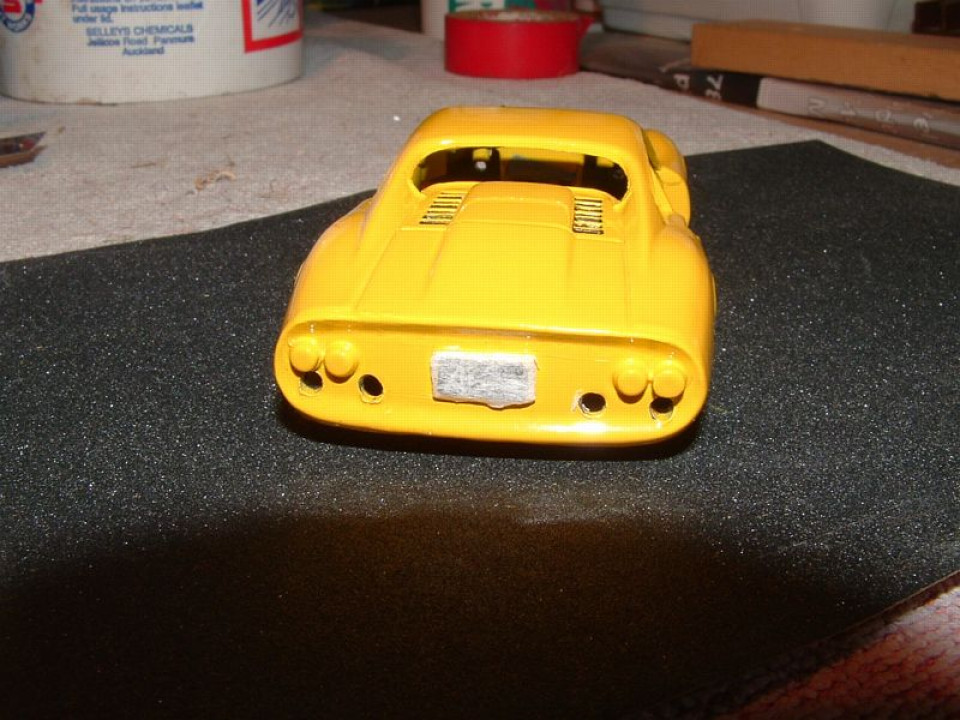
Removing the doors was the easy part! But this left me with a body shell still containing its windscreen, bumpers and light lenses. With careful attention I drilled out the rivet holding in the windscreen and then, with a very sharp knife, I removed the plastic welded "rivets" that held in the front and rear light lenses and the bumpers. These were put aside for replacement when the job was done. I then masked out the rear number plate as I wanted to retain that on the finished model and it was just a paper based sticker.
Step 2
Next I used an undercoat/primer to cover the original paint work on the model. I also applied this, using a hobby-type air sprayer, to the interior fittings. To speed up the process I VERY CAREFULLY applied heat from a paint stripper air gun to the metal casting, moving it continuously so that the model would not overheat and warp. Occasional touches with the back of the hand assured me the metal was not getting too hot.
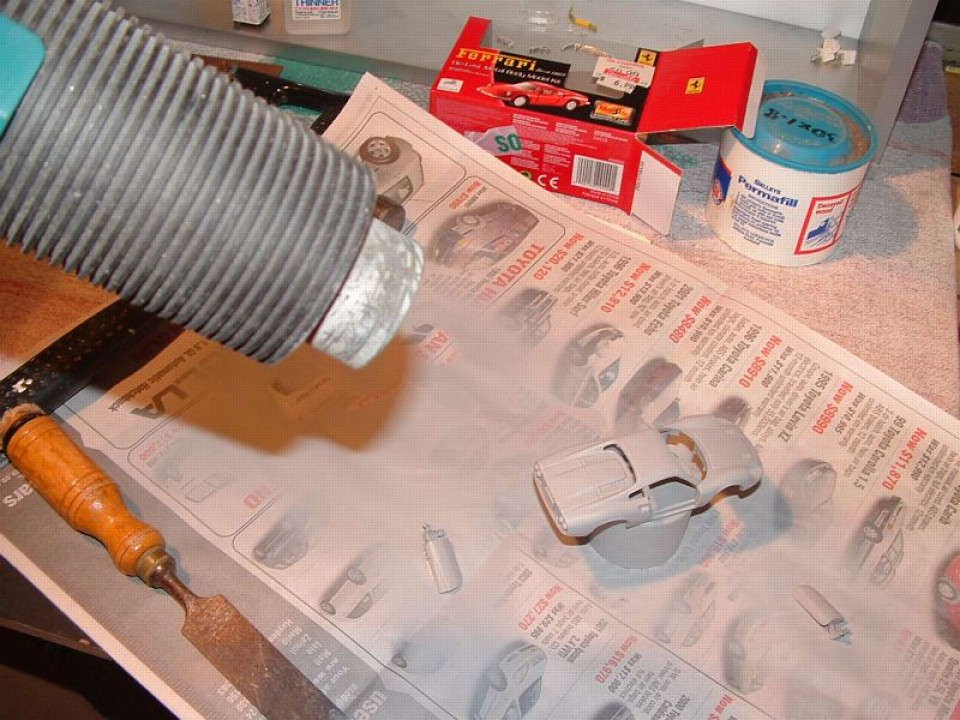
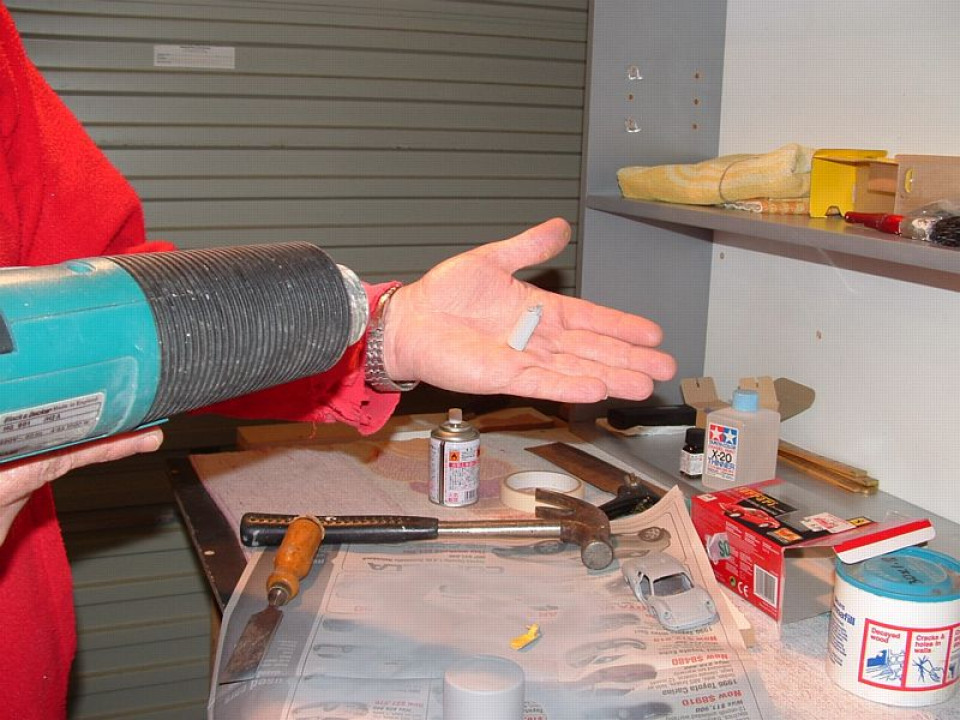
I used the same process to dry the plastic interior but in this case I held the parts in my hand on the assumption that if it was hot enough to burn me then it was way to hot for the plastic! It worked and the plastic components dried quickly and without warping.
Step 3
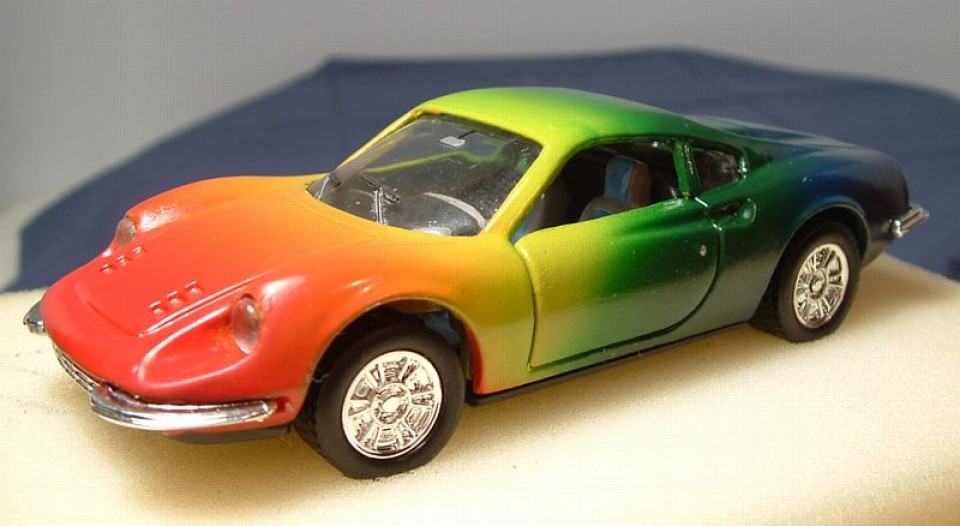
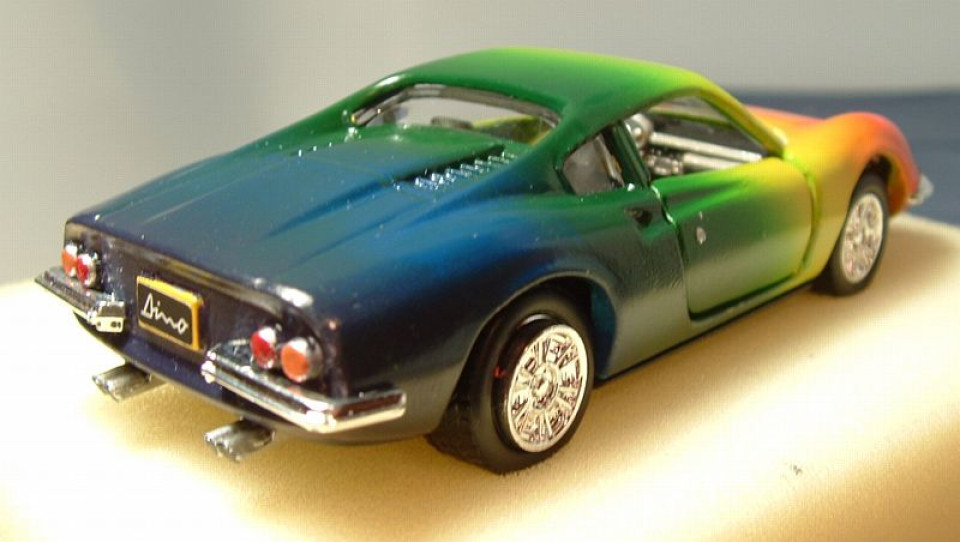
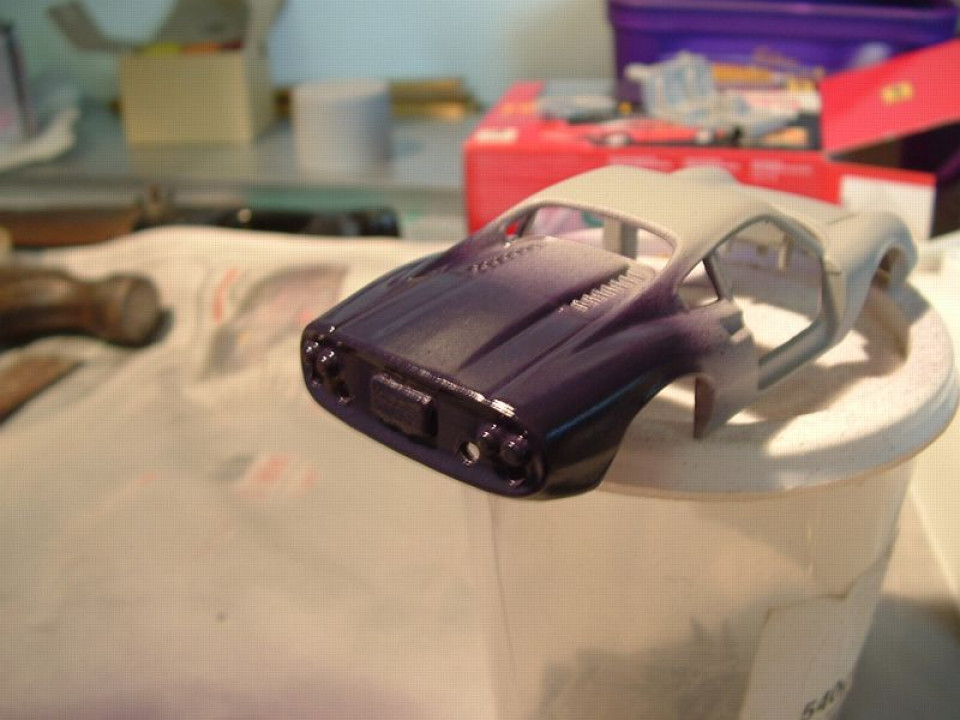
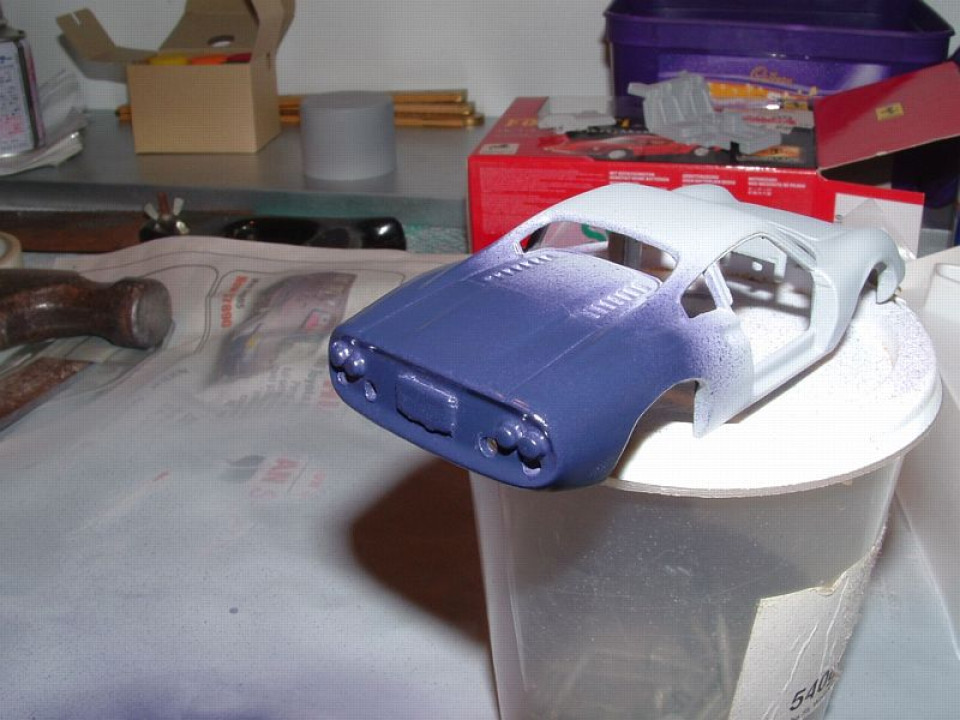
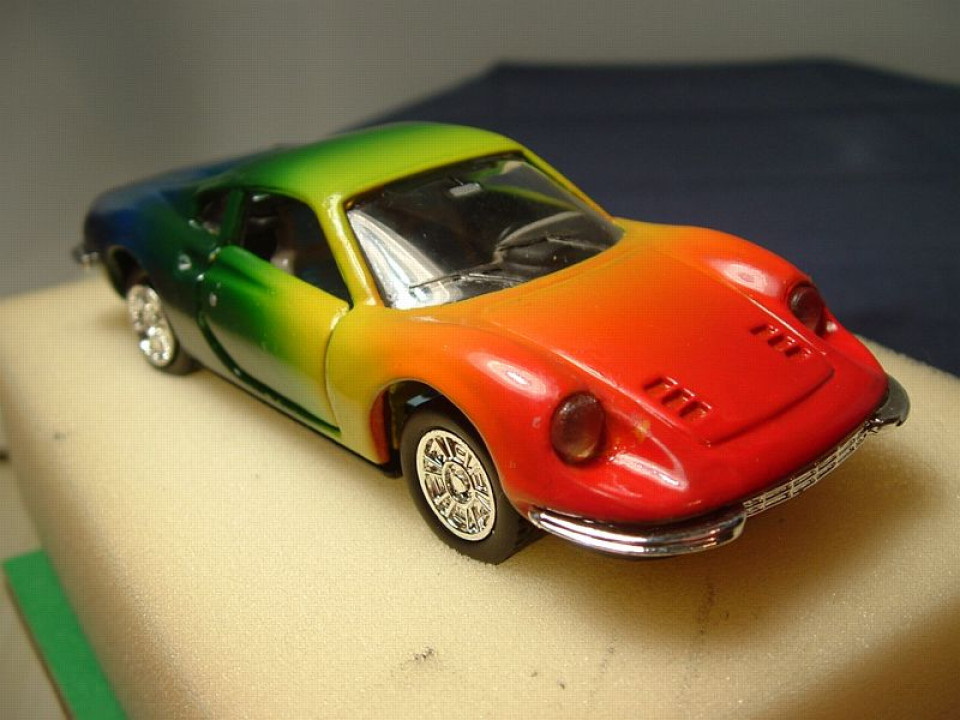
So now it was on to the real task - finish coats! Now at this point I want to stress that this was the first time EVER I had tried using a proper mini spray painter. Sure I've used cans before on bigger models, but here I was trying to spray a rainbow on a 1:43 scale car!
So here goes.... with Indigo first (self mixed using black and dark blue until I got it "right") followed by the blue....
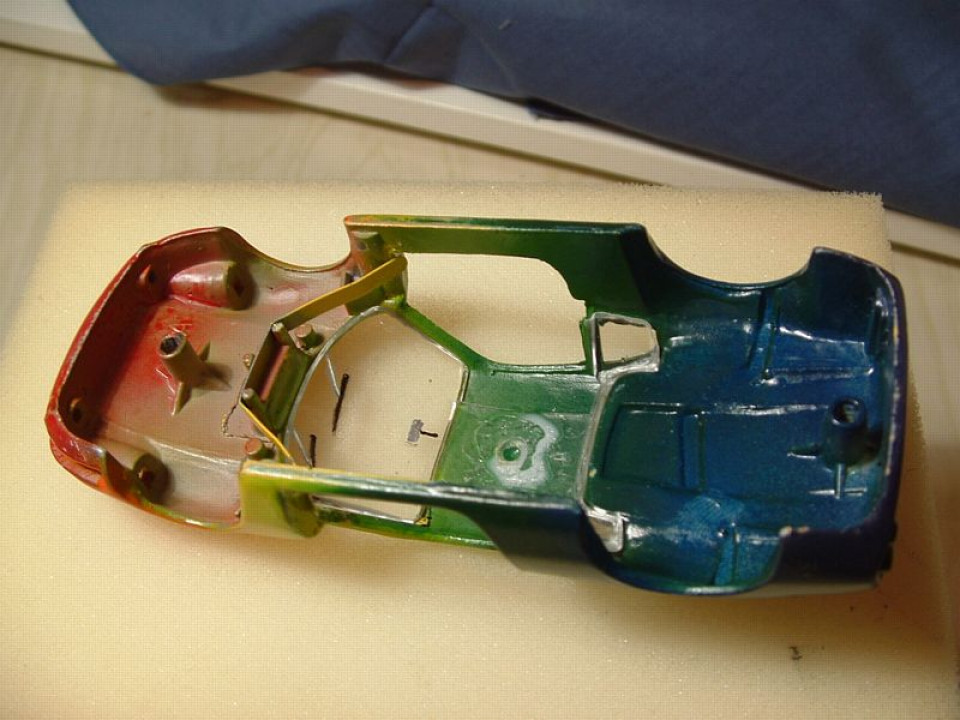
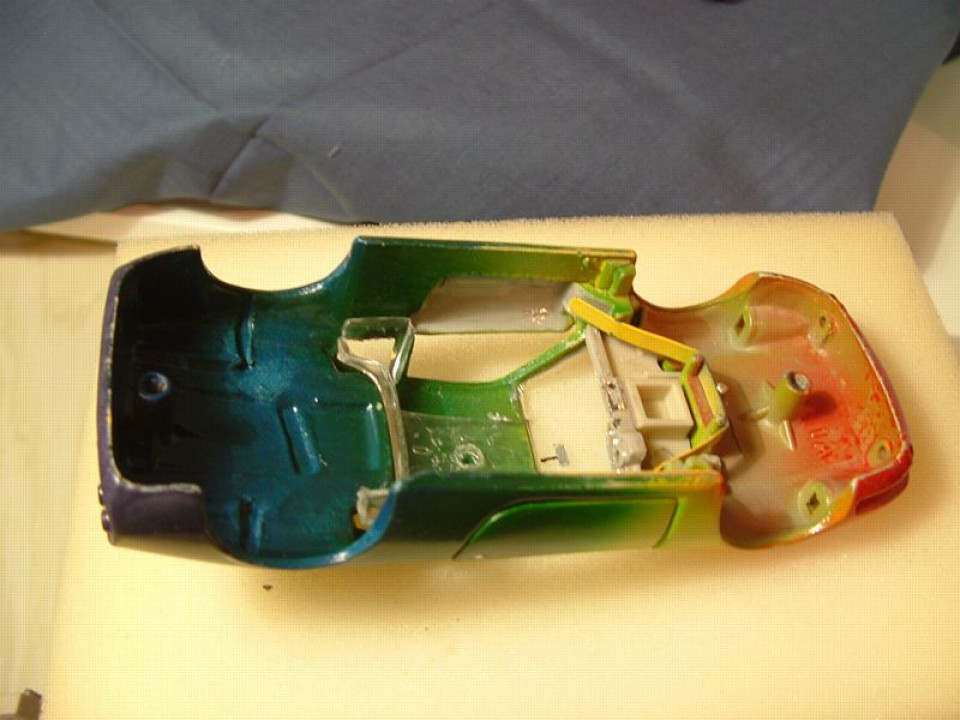
Then came green... and I struck my first problem. Unnoticed by me the temperature had dropped, the casting had cooled and the paint RAN! I quickly grabbed the heat gun but it was too late... then I overdid the heat and bubbled the paint. Only solution - sand it back.
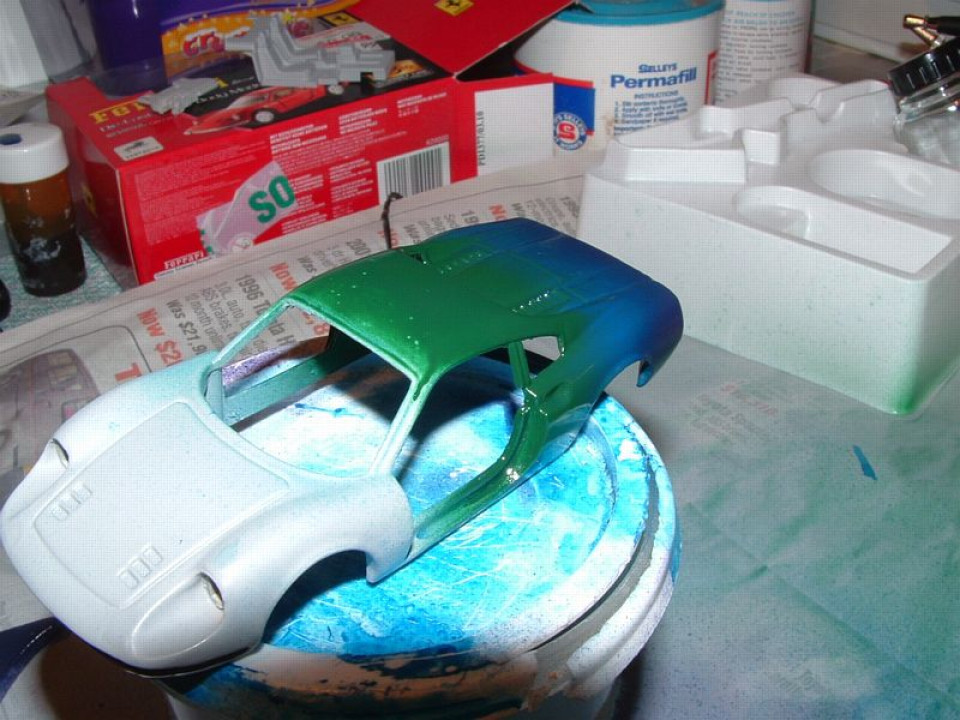

Once sanded I gently warmed the casting and had another go with the green - slightly better but when the yellow was applied I struck problems with the blend - solution was to sand again and try again.
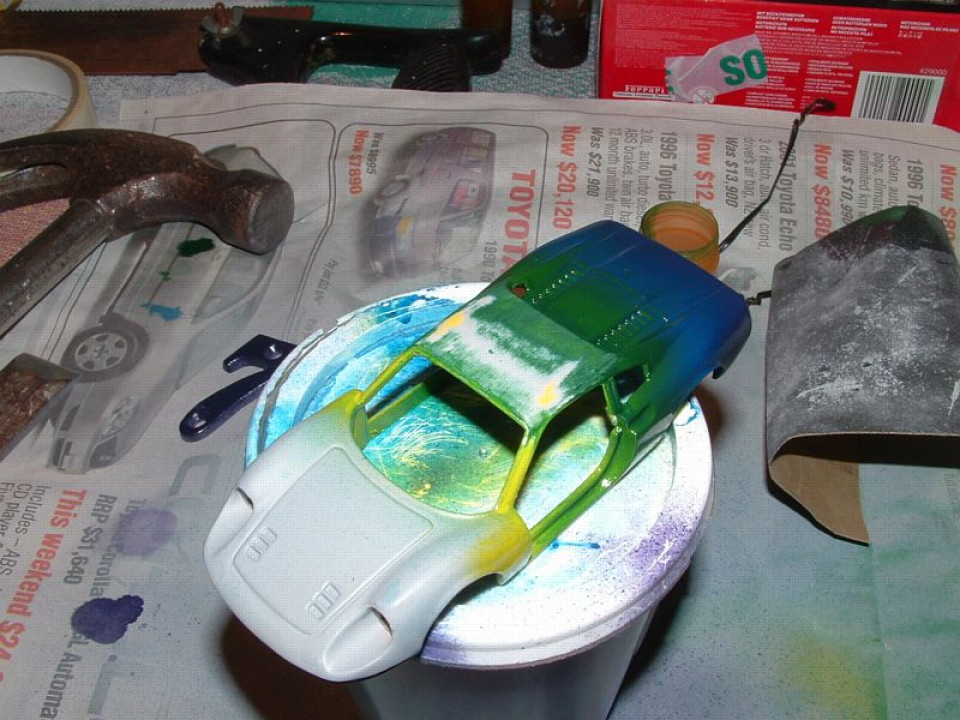

Finally I had a reasonable coating of yellow but the blend still wasn't right. I resolved to move on and come back to that later. You can see the "ridge" in the paint on the roof at the point where green meets yellow. I needed to think about that so on went the orange....
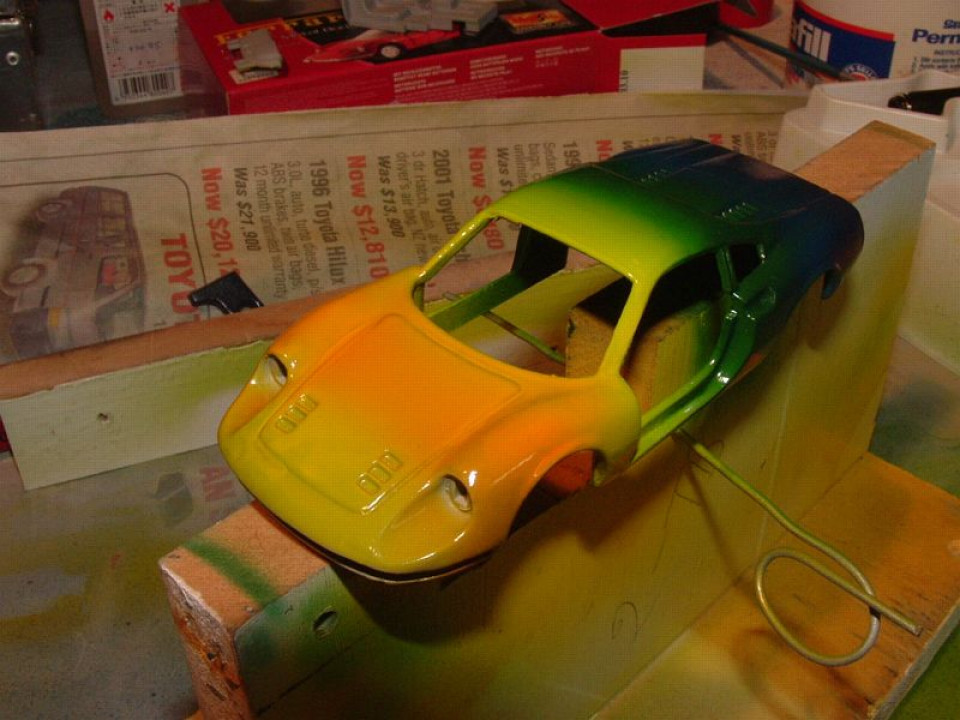
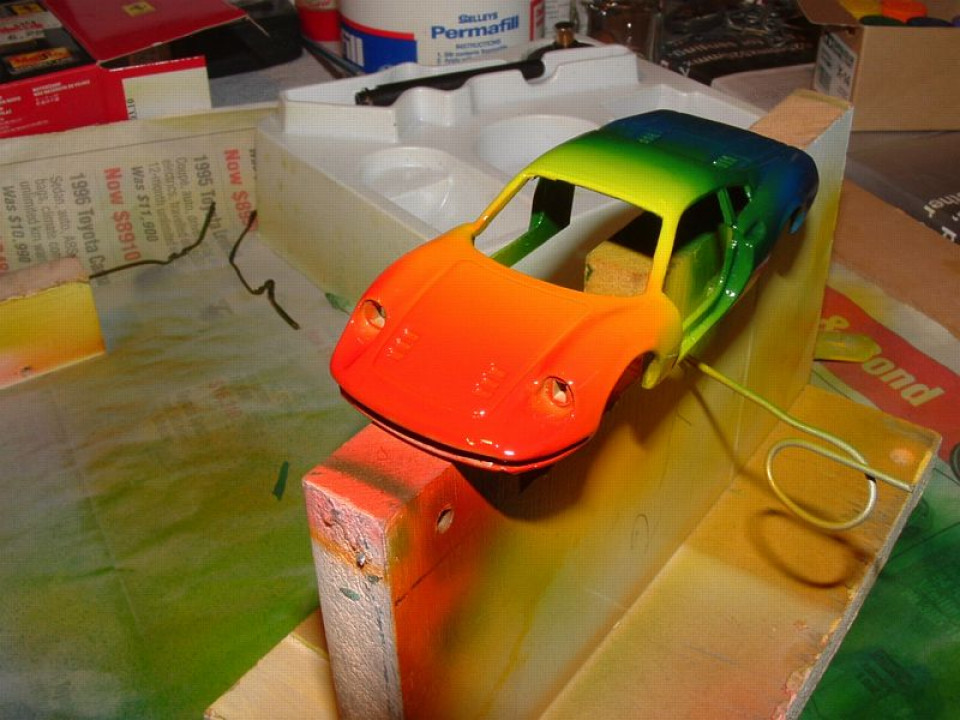
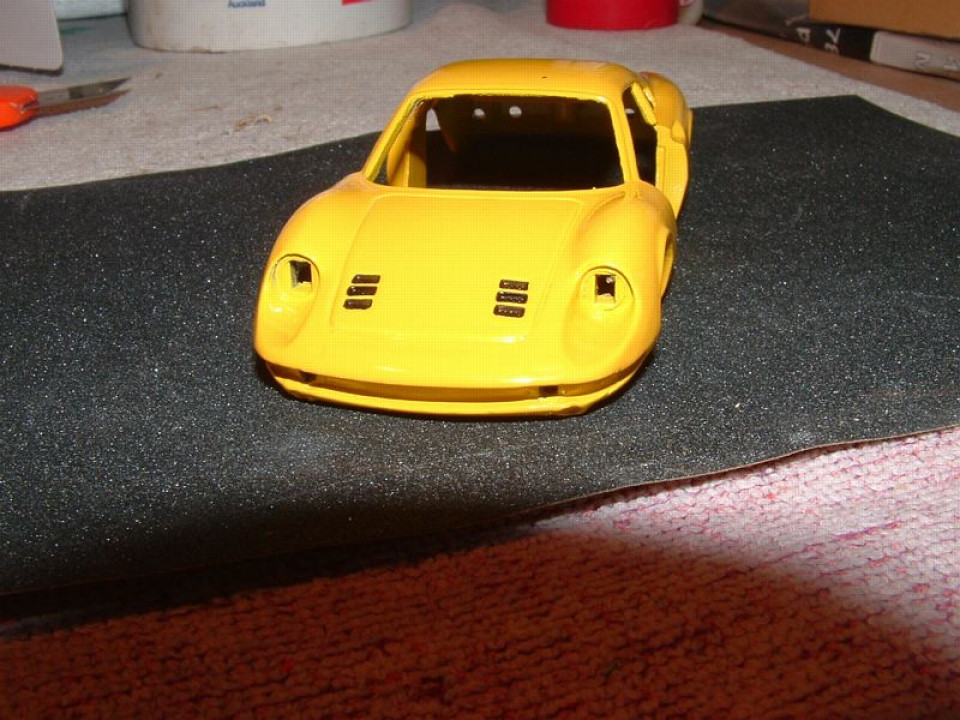
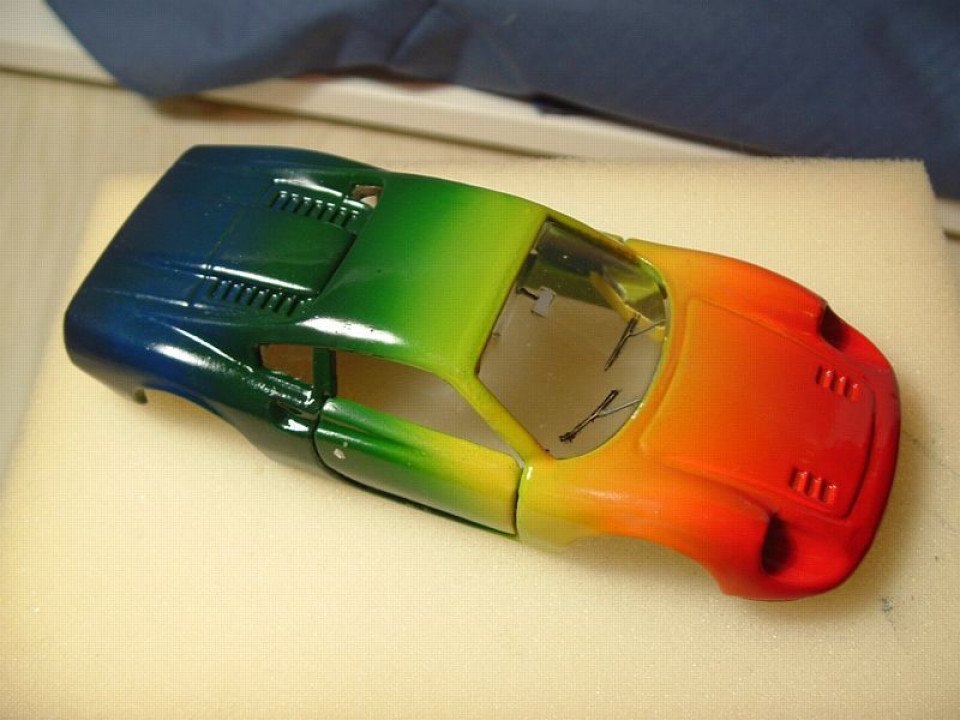
At last I was on to the red and by the time it had been applied I had worked out what to do with the roof blend. My solution was to very very lightly sand the point where they overlapped and then I sprayed several very light coats of yellow from the front of the model to the back, then did the same with the green spraying from the back of the model to the front.
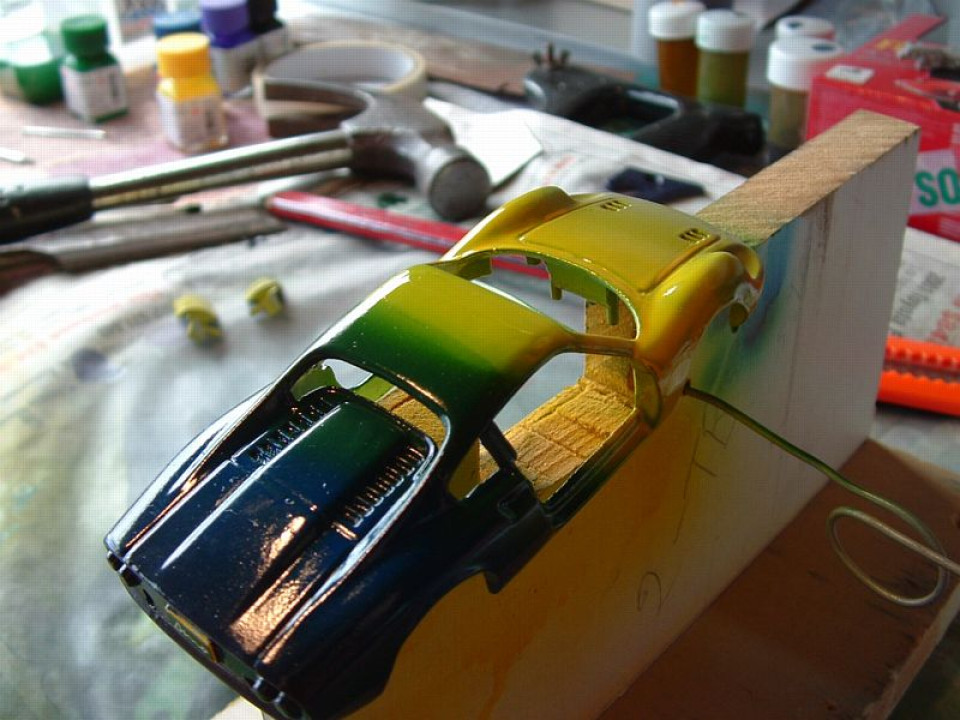

Although there were still imperfections in the roof paint I decided to leave that be and resolved to remember this lesson for future attempts on other models.
Step 4
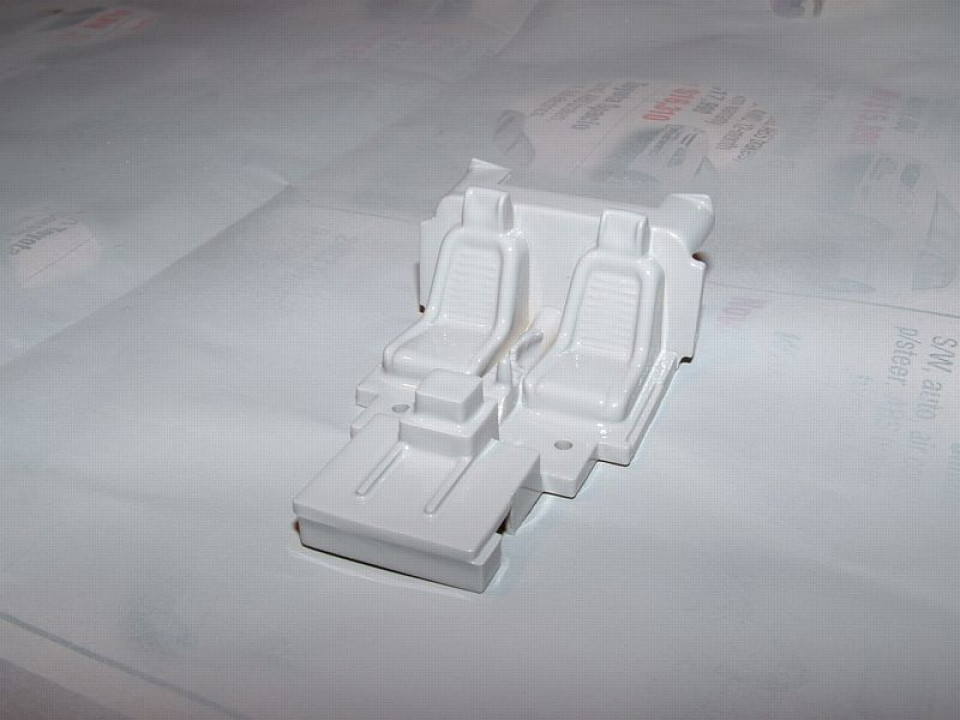
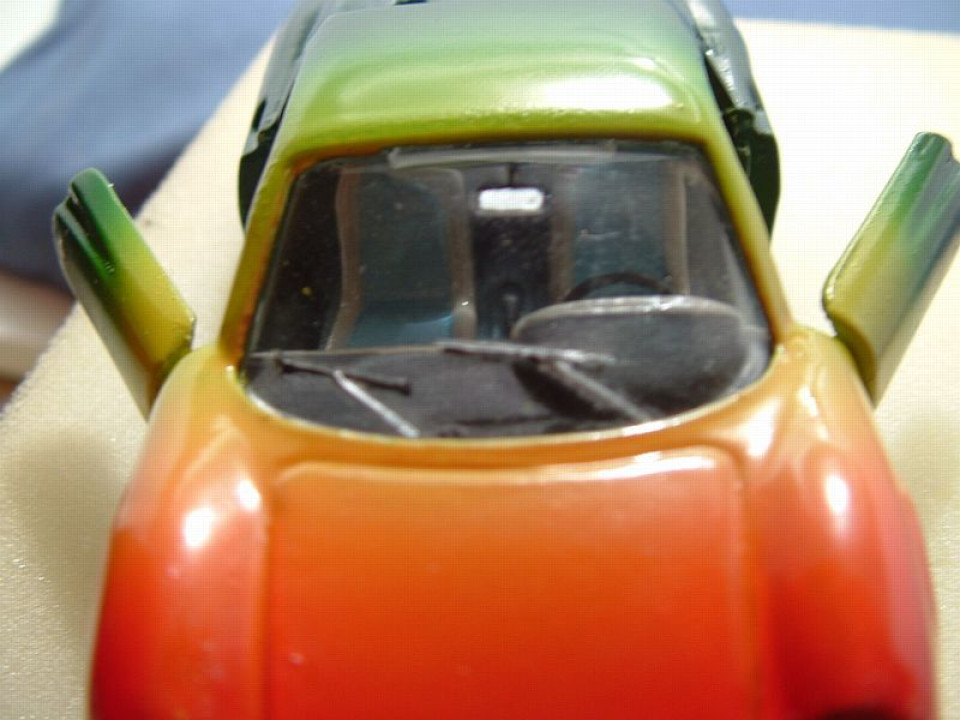
I now turned my attention to the interior. This was brush painted using Humbrol and Tamiya paints. I used matt black for the rear parcel shelf, plus the front housing that doesn't show when the model is assembled. A light grey was used for the seats with blue inserts. Carpets were painted blue and the sterring wheel and brake lever were also picked out in silver, black and red. Although the photos don't show it, the finished edges are not as rough as they appear here.
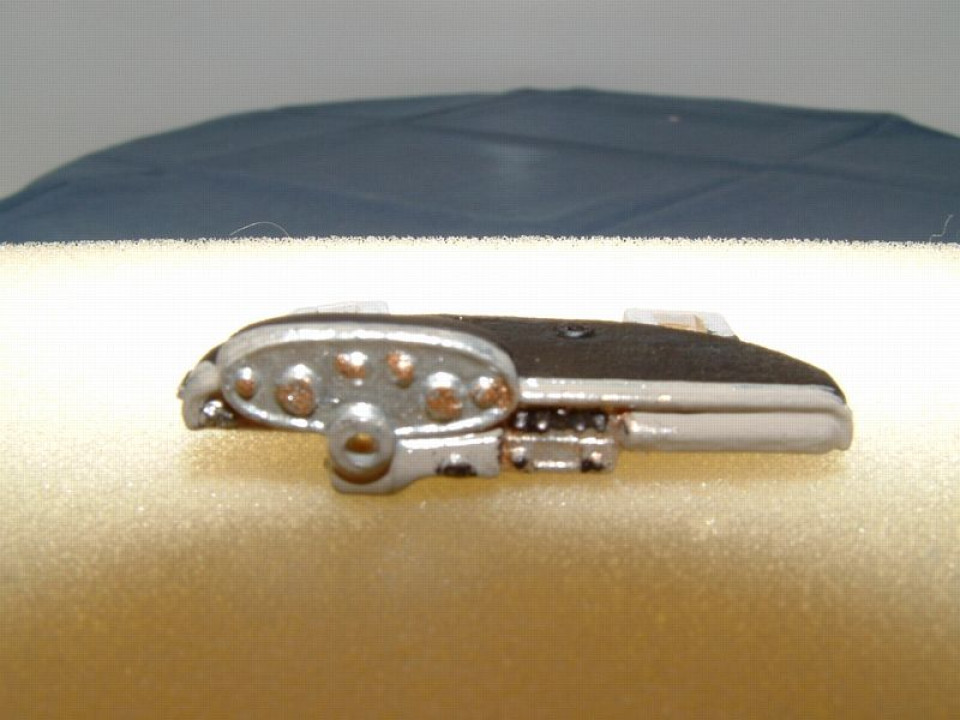
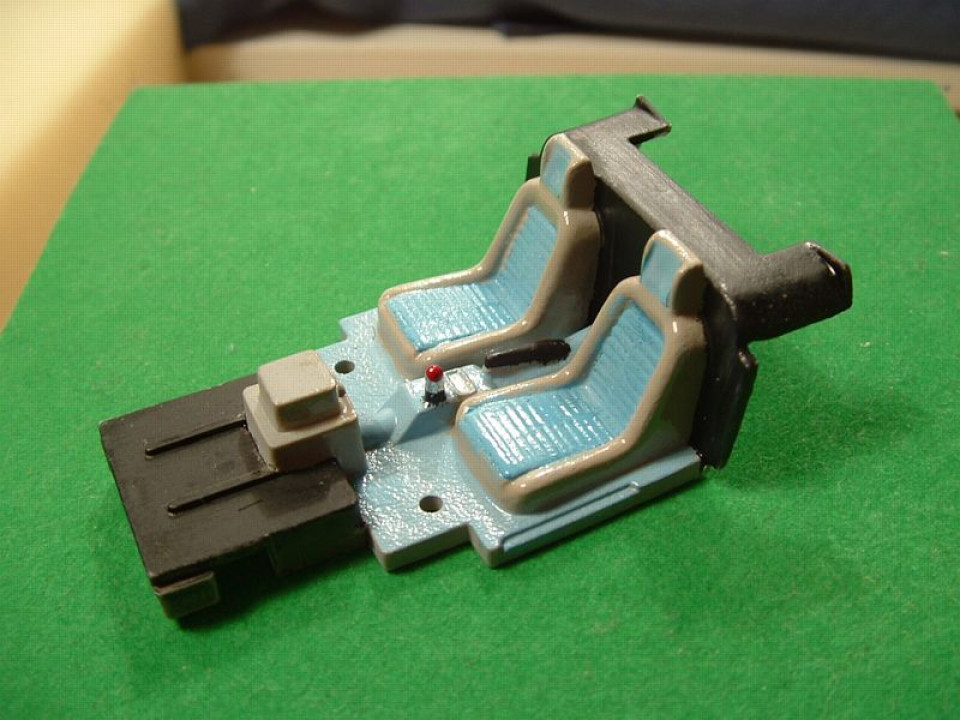
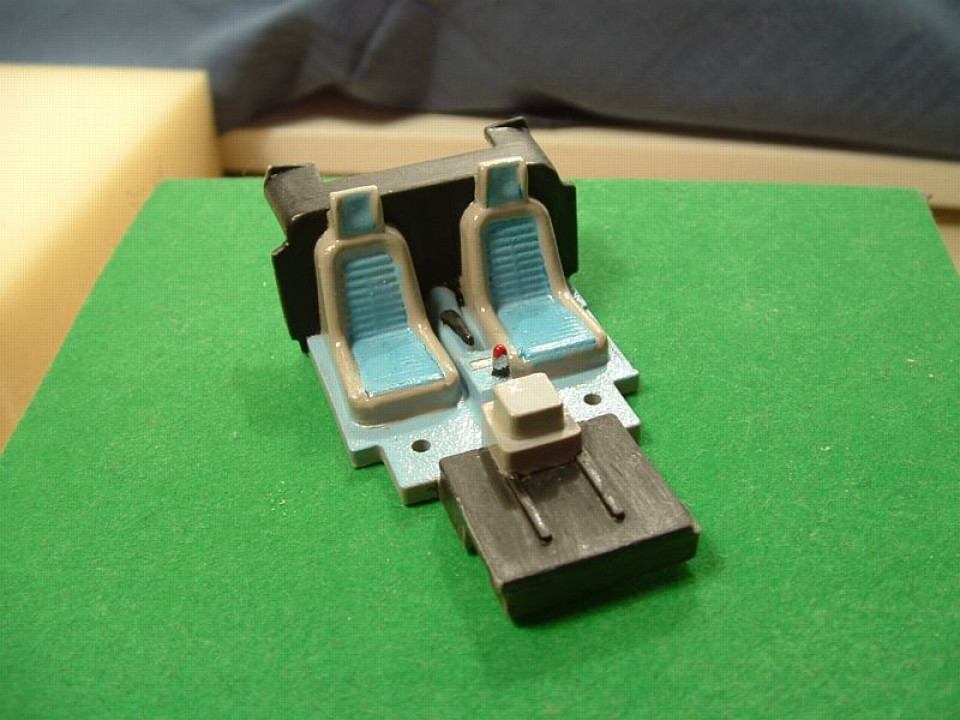
The dash was treated to a coat of matt black, then grey, with the dials and radio being picked out in gold and black.
Step 5
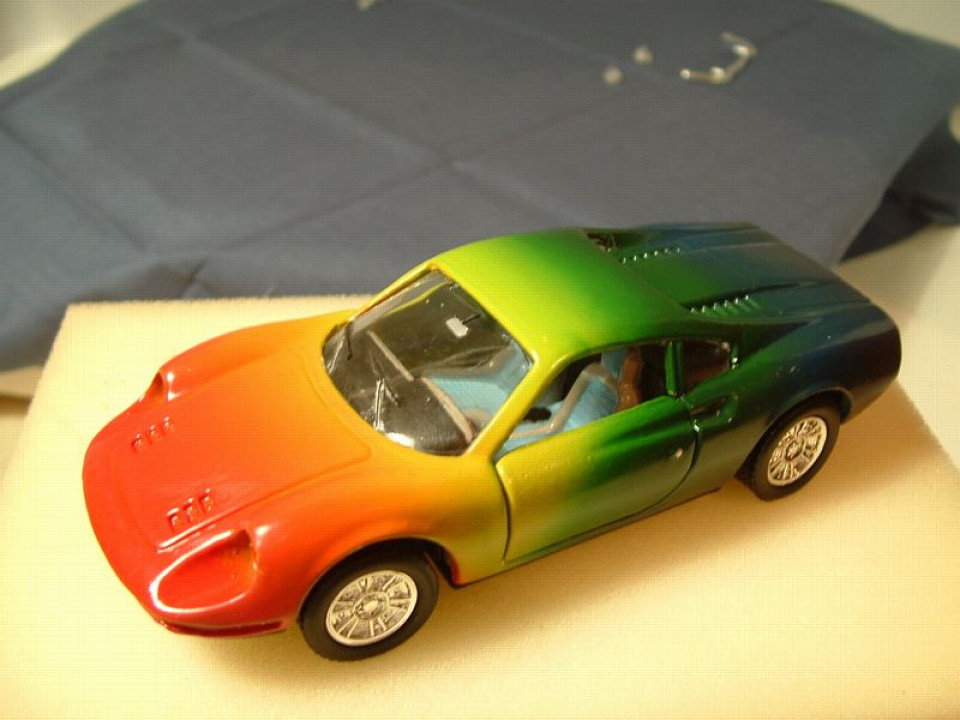
Now it was time to do something about the doors. I refitted them to the body and then sprayed them in situ, attempting to get the same angle and depth of colour as on the body. It seems to have worked.... but it took half a dozen attempts to get there with problems of overspray occurring particularly on the right hand (passenger) side.


Step 6
|
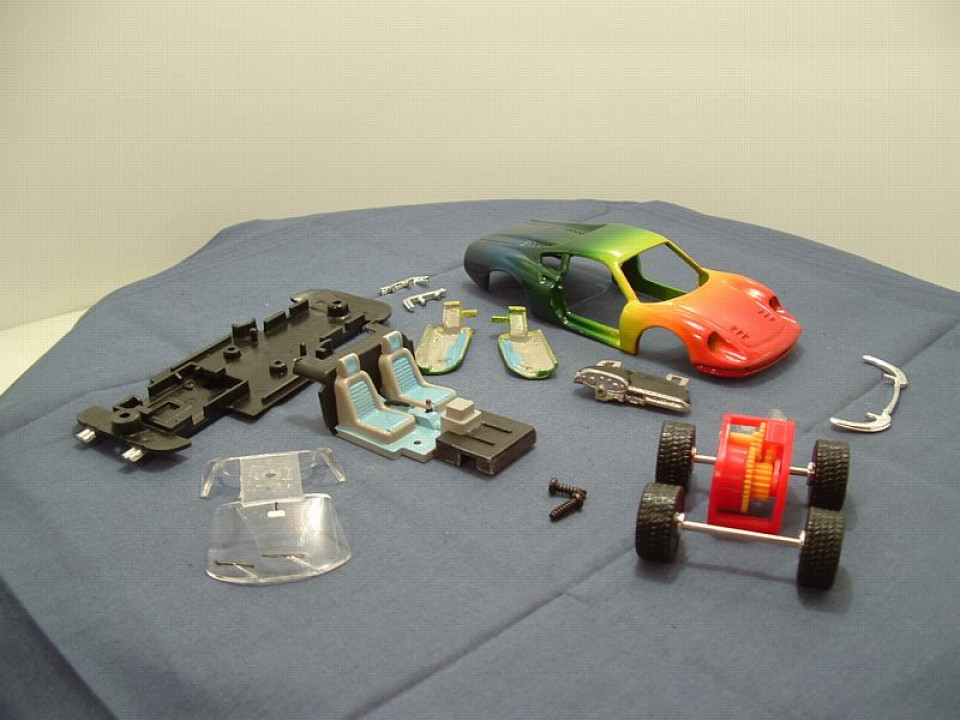
I then laid out all the component parts of the model to ensure I had not lost anything. It dawned on me that while I had taken care to paint everything in sight I had omitted to do one thing... so it was off to the paint box once again in search of an ultra-fine brush. After highlighting the windscreen wiper arms in silver and the blades in black on the exterior of the windscreen, and not getting as good a result as I'd wanted, I realised I should have painted on the inside of the screen - and that's what I did for the interior rear vision mirror giving a slightly better job. I'll need more practice at this before I'm satisfied with the finish so I hope The Warehouse has another sale soon so I can buy more small kits! |
|
Step 7
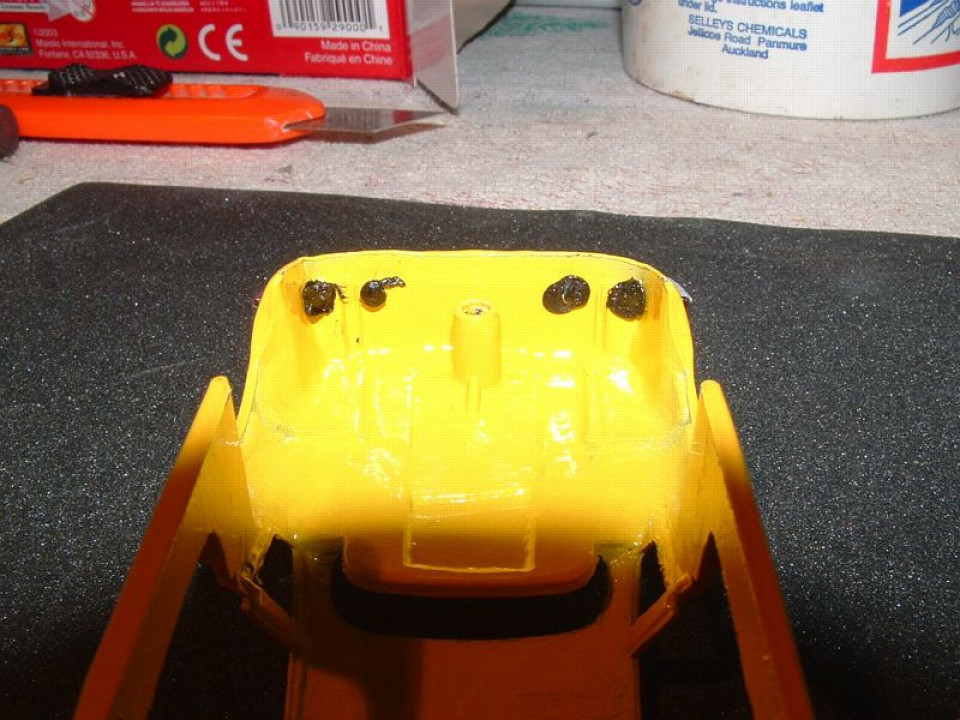
At last it was time to reassemble the beast! First job was to refit the windscreen and since I'd drilled out its rivet I used PVA glue to position and hold it in place as it dries clear. Then I refited the doors followed by a quick check to ensure everything fitted snugly again.

Next I positioned the dash which simply push-fits into the front of the car and turned my attention to the baseplate, etc. The rear motor and axle have to be fitted first, followed by the front axle which is then held in place by the interior. It all seemed to fit together quickly and easily.

The baseplate and interior were then fitted to the body. Its easier to do this with the body sitting on its roof and then gently slipping the interior/baseplate into the body while ensuring the front axles don't get knocked. If they do its a good bet that the interior will come loose and the whole thing won't fit together - TRUST ME!
Step 8
Screw the baseplate on.. doesn't the model look great? OOPS!! forgot to fit the steering wheel! Won't get far down the road like that! Disassemble and fit steering wheel - there that looks better!


Step 9
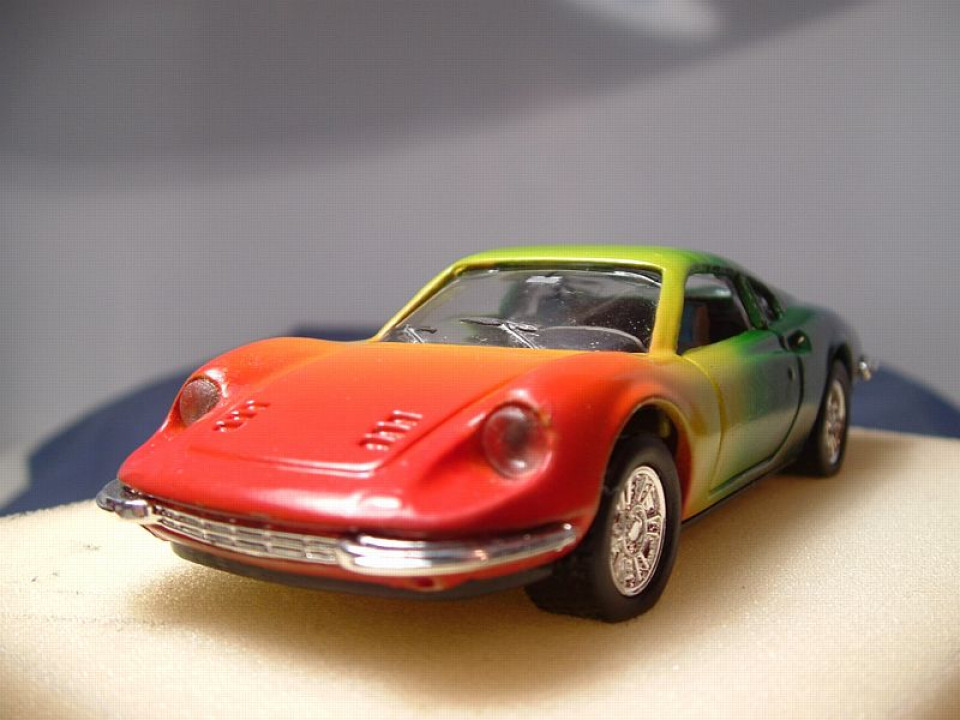
Here she is from the front left... and right... and doesn't that steering wheel look right at home! Here's a shot of the wipers and part of the interior taken through the windscreen too!
Step 10
Write article for Club Magazine!!!
a) Sit down at computer, with a LARGE cup of coffee, weed out photos
b) resize them, type up article and upload to web site.
c) while its uploading, pop outside for a smoke, then convert web site pages to Word Document and send to the Editor via email for inclusion in the club magazine, Miniature Auto. [For those of you without computers, grab coffee, stationery, etc and write it down (step 10a), include photos and post to me. I'll type it up and send to the Editor (steps 10b and c)].
Ian Cousins, Wellington